loader

Activity No. 11: Send the data on the LoRa network and display it on the Vittamap interface (IoT sensors kit)

Use of the LoRa module with the NUCLEO-L476 board

LoRaWan is a radio communication protocol (frequency 868 mHz in France) allowing the exchange of data between connected objects. It is established by the LoRa Alliance for global standardization.

The signal is emitted over a large spectral width, limiting the risk of interference and allowing data to be sent from outside or inside over long distances (1km in urban areas - up to 20km in rural areas). Sending messages is unlimited.
 
However, unlike 4G and 5G networks, the amount of data in LoRaWan networks is very low, only a few kilobits per second. 
This type of network is therefore used in the case of the Internet of Things (IoT - internet of things) or fixed sensors (for example temperature, humidity, etc.). 

Sensors using LoRa technology (modulation of radio waves) connect to the internet via gateways. These can be antennas (as in France with Orange) or boxes to be connected to your personal fiber/adsl network.

To send data on the LoRaWan network, the following connection must be made: 
- Connect the NUCLEO-Shield to the card connectors. 
- Connect, using the Grove cable, the LoRa E5 module to the available UART port.
- Fix the NUCLEO-IKS01A3 module over it.
- Connect the L476RG board to the computer using the mini-USB cable.

LoRa-EN

Let's get to programming now! 

Two blocks are available in the Communication of the block locker. 
A block to initialize the module on first use, a second block to send sensor data. 


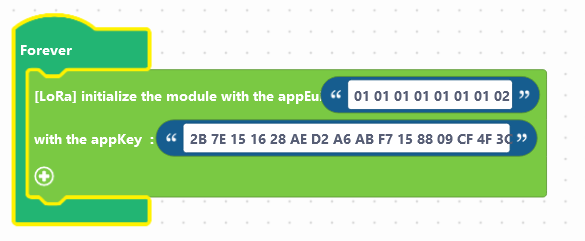
First, it is necessary to initialize the LoRa E5 module. This will make it possible to recover its unique identifier to connect it to the network. 

To do this, the "[LoRa] initialize the module..." block must be placed in the At start-up block. (Do not touch the values ​​already entered in the block). 

lora-en
Then transfer the program to the card (use the "Upload" button (see Activity 0: Getting started with the board) to start the copy) and open the console at the bottom of the interface. 

The devEUI identifier will appear, it will be necessary to note it, it is the identifier of your module.

Now that we have initialized the module, you can send data from the sensors. 
As the LoRa protocol supports the emission of small amounts of information for fixed objects, we will use the NUCLEO-IKS01A3 board and its temperature, humidity and pressure sensors. 

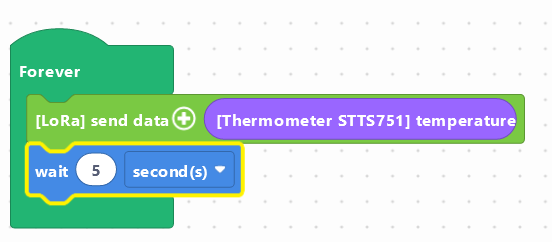
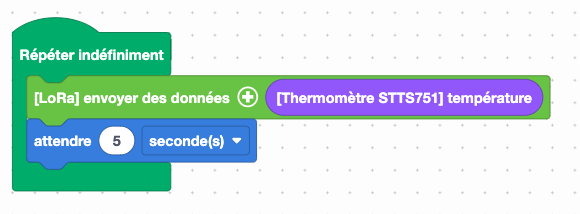
For example, to send temperature information, use the block: 
"[LoRa]send data (...)" in the Communication of the block locker
and the block: "[STTS751 Thermometer] temperature" in the part Sensors
lora-en-2


iot-lora-donnees-FR

A pause of 5 seconds must be added to the program. 
Then transfer the program to the card. 

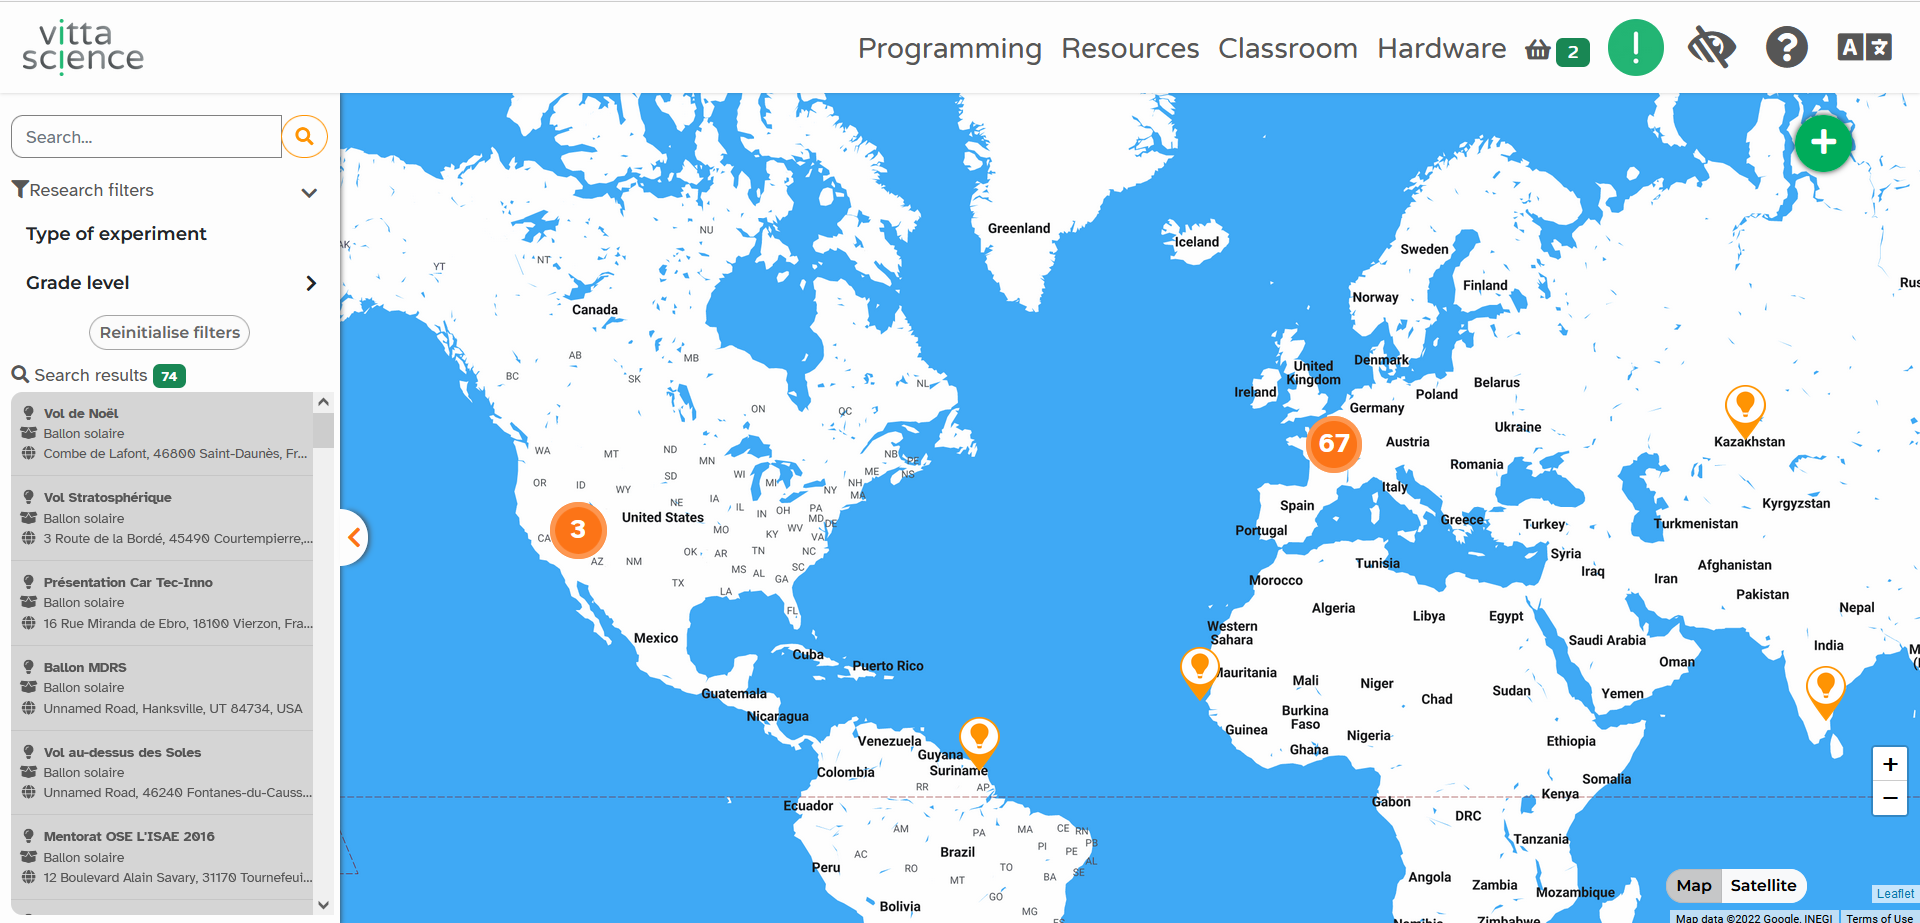
Data is now transmitted every 5 seconds on the LoRa network. To visualize them, you will use the Vittamap map developed by Vittascience, available at the following address: https://en.vittascience.com/vittamap/
vittamap


This interactive map brings together all the experiences shared by the Vittascience user community. 

You will have to add an experience by clicking on the plus, at the top right.
add-experiment-EN


Fill out the form by completing the following mandatory information: 
- Project name 
- Type of kit: select LoRa sensors
- devEUI identifier: note here the identifier displayed in the console (without the spaces between the characters). 

- Location: place your module on the map by performing a search or by clicking to locate yourself. 

- Start date: select the start date of your experience

Finish filling in the other fields, and click on the Add experience button at the bottom of the page. 

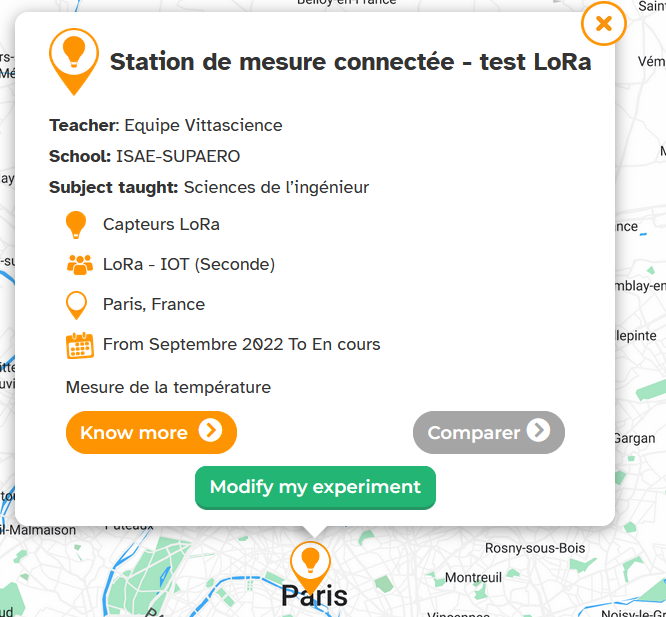
Once your experience has been added, you will be able to view the data received by clicking on the Know More
lora-station

رخصة الاستخدام